3D Printing
- Jeremy Horn
- Feb 1, 2017
- 5 min read
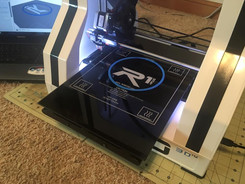
In August of 2016 my Robo3D R1+ showed up and everything changed.
I had been interested in the 3D printing world for a long time, but the technology and pricing just wasn't in the realms of possibility for me, until now. A good friend of mine had been printing for a couple of years and had used a couple of different printers, but once he found the Robo3d line of printers he was hooked. He now has four of them. I was fortunate to get in on a sale they were having in the summer of 2016 and got one of these amazing printers for two hundred off retail.
I found this amazing web site called Thingiverse that people upload there creations to for others to print. I found so many cool things to print, it was over whelming. The first project I finished was actually printed by my friend as my printer hadn't showed up yet. I was putting together my Loki costume and wanted the scepter. I found an amazing model on Thingiverse and had it printed. I then went about putting together my first 3D printed project. There is a lot of prep work before you can glue everything together. Lots of sanding and filing so everything fits nicely together. Once everything fit the gluing began. I used a gel super glue in the beginning. I am now using an Acrylic Cement. Once it was all glued together a few coats of filler primer was sprayed over the whole thing then more sanding. I then masked off the blades and sprayed the whole thing antique gold. Once that had dried I removed the masking and hand painted the blades silver. After all that I went in and added a little weathering here and there with black and gold. I added three super bright blue LED's into the jewel which I wired to a switch in the bottom of the grip to be able to turn it on and off. It is run with a 9v battery. I was super happy how it turned out. You can see the full build here > Loki Scepter


Once my printer arrived on the door step I had it out of the box and up and running printing its calibration print. Once this print was done I was ready to start, and I have to say its addictive.
I have some other good friends that build an R2D2 and this was something I had always wanted to build. They told me that a good portion of it can be 3D printed. So I decided to investigate. They pointed me in the direction of the R2 Builders club, where I picked up all of the files to print an R2 unit. The first thing I decided to print was the restraining bolt, because we wouldn't want this little R2 unit to get away from us would we ;)

One thing lead to another and I started other projects, so poor old R2 got shelved with maybe a small print done for him here or there.
The next project was the shotgun from Evil Dead. I had wanted to do an Ash Williams costume for years and what with the new series Ash vs Evil Dead I was inspired to start the costume. The harness he wore that held the shotgun and started his chain saw I made from scratch, but finding the shotgun was a pain. Until I came across the 3D model of it on Thingiverse. That site is awesome. This was a big print for one of my first stand alone 3D print projects. It took a lot of print hours but it turned out great after I had done all of the finish work on it. I had already made a book of the dead as a prop for my costume and just needed to do the chain saw, but everyone who did this costume did the chain saw. In the new show Ash also has a "power glove" for a hand that he can interchange with the saw. As far as I knew no one had made one of these before so this is where my journey into 3D modeling started. I modeled a good part of the glove and with some other parts and some finish work, I had myself a Power Glove. The parts I modeled I have uploaded to Thingiverse here > Power glove parts
You can see my shotgun build here > Shotgun
Here is the Power Glove build > Powerglove


I also started another long term project that I work on here and there just like the R2 project. I do have the entire head built for this one though. It just needs finish work, paint and lights. Then its time to start on the body.
BB8.......

I have had some fun over the last few months printing things and finishing them. I have used a number of different filaments, but have had the best luck with the Hatchbox filament. you can find great deals on Amazon.com. As for software I am currently using the simplify3D software and am really liking how it works and how you can manipulate a lot of the functions of the printer. Its not cheap software but in my opinion worth every penny. You can pick it up at www.simplify3d.com. When it comes to 3D modeling there are a couple of different pieces of software I use. 123D is great for general modeling, but if you want to sculpt then look at Sculptris. The last thing that is worth getting is an LCD screen to be able to control your printer settings while it is not connected to your computer. I picked mine up on Amazon for around 12 dollars shipped to me. I then found a enclosure some one had designed on Thingiverse that I printed for it. Here is a link to the LCD screen I picked up, it is super easy to install in less than 10 minuets > LCD Screen
I am available for print commissions if you have a model you want printed but don't have access to a printer, just let me know and we can talk about it. The possibilities of 3D printing are endless. Follow me on Face book at Identity Crisis Costuming. if you have any questions on 3D printing or the software I am using please feel free to send me a message.
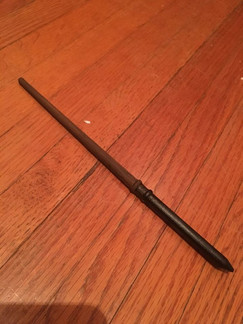
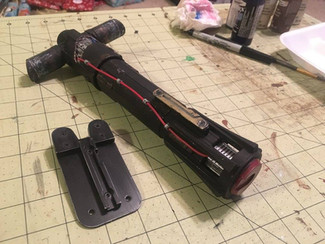
Here are a few other things I have printed.
#Costuming #Beginning #crafting #Cosplay #IdentityCrisisCostuming #3DPrinting #Robo3DR1 #Robo3D #3DModeling #simplify3D #Loki #AshvsEvilDead #Ghostbusters #BookoftheDead #Powerglove #Groot #MalRaynalds #Firefly #HarryPotter #Wands #PrincessLeia #Batman #Baterang #Lightsaber #KyloRen #BB8 #Giftbox #Ironman #Chrismasorniment #Aliens #Facehugger #props


